Imagine Image 2.0 Guide: Features, How to Use It, and 20 Best Prompts
Explore Imagine Image 2.0 features, prompting techniques, editing tools, and 20 copy-ready prompts for portraits, products, posters, illustrations, and more.
Imagine Image 2.0 is xAI’s latest model for generating and editing images with more precise instructions, sharper text, better layouts, and greater control over individual image elements. Instead of treating every prompt as a one-time generation, the model is designed for an iterative workflow in which users can create an image, modify selected areas, combine multiple references, remove backgrounds, and resize the finished design.
The model is currently available as Quality Mode in Grok Imagine on the web, iOS, and Android. Its improved ability to interpret detailed prompts makes it suitable for portraits, product photography, advertisements, posters, illustrations, game assets, infographics, and social media content.
This guide explains the main Imagine Image 2.0 features, shows you how to structure an effective prompt, and provides 20 copy-ready Imagine Image 2.0 prompts that you can customize for your own projects.
What Is Imagine Image 2.0?
Imagine Image 2.0 is an AI image generation and editing model developed by xAI. It can create a new visual from a written description or modify an existing image according to natural-language instructions.
According to the official Imagine Image 2.0 announcement, the model was developed around practical creative work. Its improvements focus on prompt following, typography, visual composition, subject consistency, and controlled image editing.
This means you can give the model a more structured creative brief instead of relying on a few general style words. You can specify the subject, environment, camera angle, lighting, text, layout, colors, and elements that must remain unchanged.
Imagine Image 2.0 can be used for:
- Photorealistic portraits
- Product and e-commerce photography
- Advertising creatives
- Posters and flyers
- Social media graphics
- Infographics
- Anime and illustrations
- Game characters and assets
- Icons and UI elements
- Background removal
- Localized image editing
- Multi-reference image composition
What’s New in Imagine Image 2.0?
Imagine Image 2.0 is not only designed to improve the appearance of generated images. Its main advantage is greater control over how an image is created, edited, and adapted.
More Accurate Prompt Following
The model can interpret detailed descriptions involving multiple subjects, objects, colors, positions, and visual constraints.
For example, instead of writing “a coffee advertisement,” you can describe where the coffee cup should appear, how the light should fall across the table, what text should be printed on the poster, and which area should remain empty for a logo.
Clear instructions still produce better results than vague descriptions. Important requirements should be stated directly rather than implied.
Improved Text and Layout Generation
Creating readable text has traditionally been one of the most difficult tasks for AI image generators. Imagine Image 2.0 is designed to handle typography and layouts more deliberately, making it useful for posters, advertisements, menus, presentation graphics, packaging concepts, and infographics.
When generating text, always include:
- The exact text inside quotation marks
- Its position in the image
- The preferred font style
- The text color
- The desired hierarchy
- A request to preserve exact spelling
Short headlines generally remain easier to generate accurately than long paragraphs.
Precision Image Editing
Imagine Image 2.0 includes several tools for editing specific elements without completely regenerating the image.
The Magic Wand can target the selected region, while segmentation can identify precise areas such as a person, object, garment, or background. Users can then describe the desired change while asking the model to preserve everything else.
This makes the model useful for changing:
- Clothing colors
- Product materials
- Backgrounds
- Individual objects
- Facial expressions
- Lighting conditions
- Poster text
- Decorative details
Multi-Reference Editing
Imagine Image 2.0 can accept up to five input images in one generation. Each reference can be assigned a different role, such as character identity, product design, environment, color palette, or illustration style.
A good multi-reference instruction should explain exactly how every uploaded image should be used. Avoid uploading several references without assigning their roles.
Background Removal
The model can isolate a subject and remove the surrounding background, producing a transparent asset that can be placed into advertisements, product pages, presentations, thumbnails, or other designs.
For better results, specify whether soft hair edges, transparent materials, reflections, or shadows should be preserved.
Smart Resize
Smart Resize adapts an existing composition to a different aspect ratio by filling and reorganizing the frame instead of simply cropping it.
Supported examples shown in the official release include:
- 1:2
- 9:16
- 2:3
- 3:4
- 1:1
- 4:3
- 3:2
- 16:9
- 2:1
This is useful when turning one visual into a website banner, Instagram post, vertical Story, YouTube thumbnail, or advertising creative.
How to Use Imagine Image 2.0
Imagine Image 2.0 is available through Grok Imagine as Quality Mode. The exact interface may vary between the web and mobile versions, but the basic workflow is straightforward.
1. Open Grok Imagine
Open Grok on the web or in the mobile app and enter the Imagine workspace.
2. Select Quality Mode
Choose Quality Mode when you want to use Imagine Image 2.0 for a more detailed generation or controlled edit.
3. Choose How You Want to Start
You can begin with:
- A text description
- One existing image
- Several reference images
- A prepared template
- A previously generated result
4. Write or Paste Your Prompt
Describe the desired result in a logical order. Include the subject, environment, composition, lighting, style, text, and important restrictions.
You can copy one of the prompts below and replace the details in brackets with your own information.
5. Review the Result
Check the image for:
- Spelling accuracy
- Subject identity
- Product shape
- Hand and facial anatomy
- Object placement
- Brand colors
- Factual information
- Background details
6. Refine Only What Needs to Change
Instead of rewriting the complete prompt, select the incorrect area and describe the required adjustment. Also state which parts of the image must remain unchanged.
The Imagine Image 2.0 Prompt Formula
A reliable Imagine Image 2.0 prompt can follow this structure:
Subject + Environment + Composition + Camera + Lighting + Color Palette + Visual Style + Exact Text or Details + Output Format + Preservation Constraints
For image editing, use this variation:
Reference Image + Selected Area + Requested Change + Appearance Requirements + Elements to Preserve + Output Format
For multiple reference images, assign a clear purpose to each input:
Use Reference 1 for the subject identity, Reference 2 for the product design, Reference 3 for the environment, and Reference 4 for the color palette. Combine these elements into one coherent image while preserving the defining details of each reference.
You do not need to include every component in every prompt. Use only the instructions that help the model understand the intended result.
How to Write Better Imagine Image 2.0 Prompts
Describe the Main Subject Clearly
State who or what should appear in the image. Include defining characteristics such as age range, clothing, material, color, expression, or product shape.
Avoid relying only on broad phrases such as “beautiful woman,” “cool product,” or “cinematic scene.”
Establish the Environment
Explain where the subject is located and what should appear around it. The environment influences the lighting, color palette, mood, and overall visual story.
Control the Composition
Tell the model how the image should be arranged. Useful composition instructions include:
- Centered composition
- Rule-of-thirds composition
- Symmetrical layout
- Close-up portrait
- Full-body shot
- Top-down product shot
- Low-angle camera
- Wide establishing shot
- Empty space on the left for copy
- Product placed in the lower-right corner
Describe the Lighting
Lighting instructions can significantly change the result. Examples include:
- Soft window light
- Overcast daylight
- Golden-hour sunlight
- Hard studio lighting
- Rim lighting
- Warm candlelight
- Diffused beauty lighting
- Dramatic side lighting
Put Exact Text in Quotation Marks
If the image needs a title or slogan, write the exact words in quotation marks. Keep the text short and state that the spelling must remain unchanged.
State What Must Not Change
Preservation constraints are particularly important when editing an uploaded image.
For example:
Change only the jacket color. Preserve the person’s face, pose, hairstyle, body proportions, background, lighting, shadows, and camera angle exactly as shown.
20 Best Imagine Image 2.0 Prompts
The following Imagine Image 2.0 prompts cover portraits, product photography, advertising, typography, illustration, game design, and image editing. Each prompt can be copied directly and customized.
1. Natural-Light Professional Portrait
Create a realistic professional portrait with natural skin texture, balanced lighting, and a clean composition.
Create a photorealistic waist-up portrait of a confident Asian woman in her early thirties wearing a tailored cream blazer over a simple black top. Place her beside a large office window with soft morning light illuminating one side of her face. Use a neutral modern office background with subtle depth of field, natural skin texture, realistic hair strands, and a calm, approachable expression. Frame the subject using an 85mm portrait lens at eye level. Use warm neutral colors and understated editorial styling. Preserve realistic facial proportions and avoid excessive skin smoothing. Vertical 4:5 composition.
 Customize: Change the person, outfit, profession, environment, or aspect ratio.
2. Cinematic Street Portrait
Use this prompt for an atmospheric portrait with natural city details.
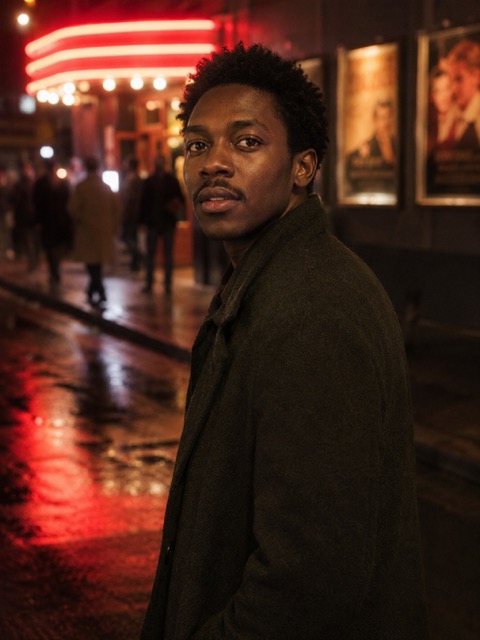
Create a cinematic nighttime portrait of a young Black man standing outside a small neighborhood cinema after rain. He wears a dark green wool coat and looks slightly past the camera with a thoughtful expression. Red and amber marquee lights reflect naturally across the wet pavement. Include soft background pedestrians and vintage movie posters without readable brand names. Use a medium close-up composition, shallow depth of field, realistic skin texture, subtle film grain, and restrained color grading. The image should feel like a frame from an independent drama, not a fashion advertisement. Vertical 3:4 format.
 Customize: Replace the location, clothing, weather, or cinematic mood.
3. Outdoor Lifestyle Portrait
This prompt creates a relaxed lifestyle image suitable for editorial or social media use.
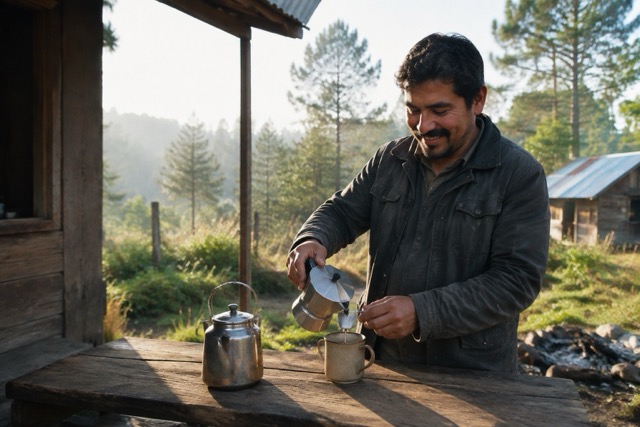
Create a candid lifestyle photograph of a smiling Latino man in his forties preparing coffee at a wooden table outside a small countryside cabin. Surround him with pine trees, morning mist, a metal kettle, and a simple ceramic mug. Use soft early-morning sunlight, natural colors, realistic clothing folds, and an unposed expression. Frame the scene as a medium-wide photograph captured with a 50mm lens. Keep the environment believable and slightly imperfect. Avoid artificial glamour lighting, plastic skin, or exaggerated background blur. Landscape 3:2 format.
 Customize: Replace the activity, location, subject, or time of day.
4. Minimalist Skincare Product Photo
Use this prompt to create a polished e-commerce or beauty campaign visual.
Create a premium studio product photograph of a frosted glass skincare serum bottle with a matte white dropper cap. Place the bottle upright on a pale limestone pedestal with a small pool of water around its base. Add soft reflections, realistic water droplets, and one delicate green leaf in the background. Use diffused side lighting, subtle shadows, warm ivory and sage colors, and a clean minimalist composition. Leave generous negative space above the product for advertising copy. Keep the bottle geometry perfectly straight and the label area clean. Square 1:1 format.
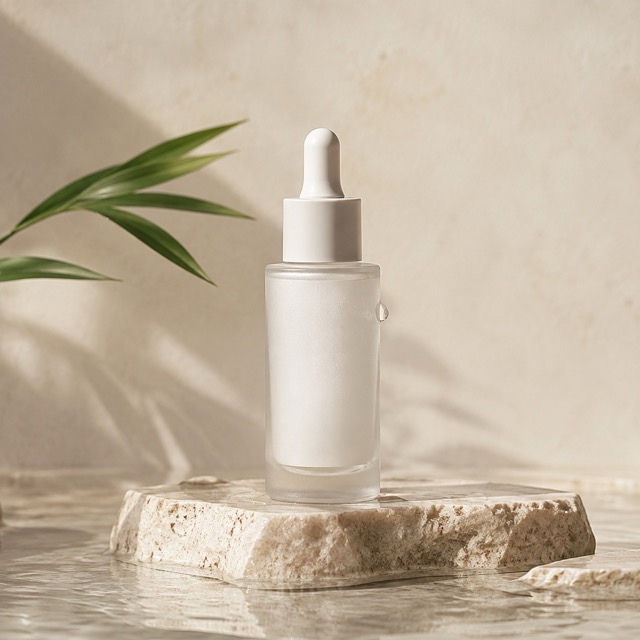 Customize: Replace the product, material, colors, or supporting objects.
5. Luxury Perfume Advertisement
This example is suitable for fragrance, cosmetics, jewelry, and premium product campaigns.
Create a luxury advertising photograph of a rectangular amber perfume bottle resting on dark red velvet. A narrow beam of warm light passes through the bottle and creates a realistic golden reflection on the fabric. Add two dried rose petals near the foreground and keep the background deep burgundy with a gradual shadow. Use macro-level material detail, sharp glass edges, realistic liquid refraction, and elegant editorial composition. Leave empty space in the upper-left corner for a headline. Do not add a brand name or random lettering. Landscape 4:3 format.
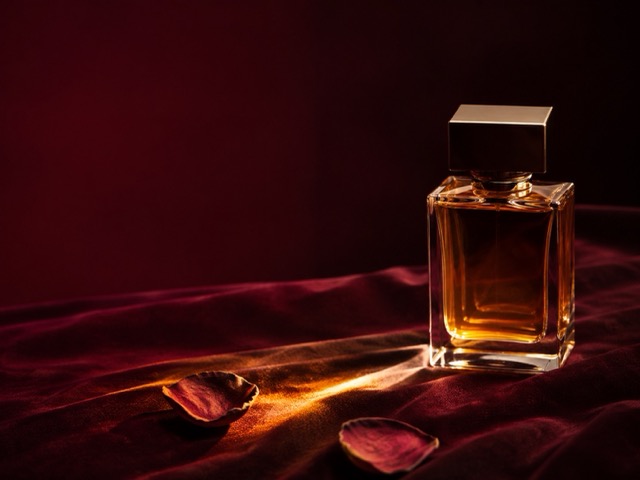 Customize: Change the bottle design, fabric, color palette, or campaign mood.
6. Beverage Product Splash
This prompt creates a dynamic commercial product image without relying on a futuristic style.
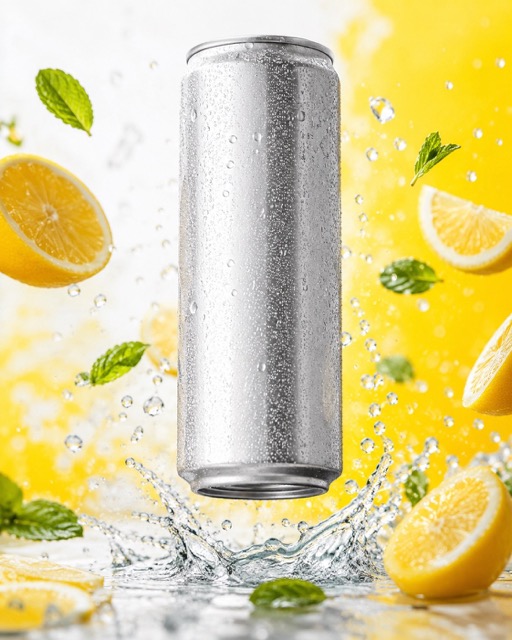
Create a high-speed commercial photograph of a cold sparkling lemon drink can suspended above a shallow splash of water. Surround the can with fresh lemon slices, small mint leaves, and crisp droplets frozen in motion. Use a bright yellow and clean white background, natural condensation on the can, accurate metallic reflections, and strong but realistic studio lighting. Keep the can upright, fully visible, and free from distortion. Leave the center label area blank for later branding. Use an energetic advertising composition in vertical 4:5 format.
 Customize: Replace the beverage flavor, fruits, package type, or background color.
7. Handmade Product Photography
This prompt works well for Etsy-style products, small businesses, and artisan brands.
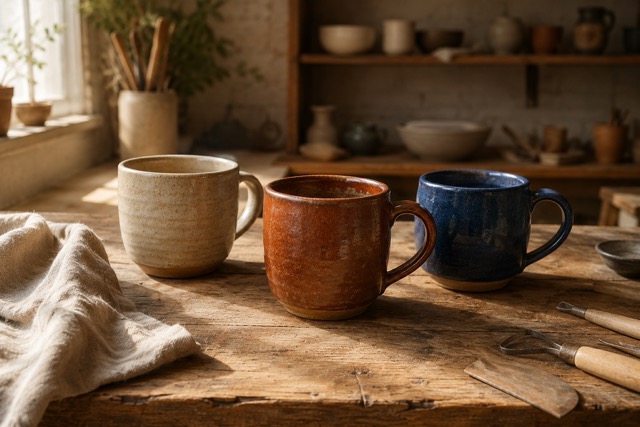
Create a warm editorial product photograph of three handmade ceramic mugs arranged on a worn oak table inside a small pottery studio. Each mug should have a slightly different natural glaze in sand, rust, and deep blue. Include subtle fingerprints and handmade imperfections in the clay. Add a folded linen cloth, a few pottery tools, and soft afternoon sunlight entering from the left. Use natural shadows, tactile surface detail, muted earthy colors, and a calm authentic atmosphere. Do not include people, logos, or text. Landscape 3:2 composition.
 Customize: Replace the handcrafted item, materials, workspace, or color palette.
8. Restaurant Promotional Poster
This prompt combines food photography with a simple promotional layout.
Design a vertical restaurant poster for a weekend brunch promotion. Show an overhead photograph of sourdough toast, poached eggs, roasted tomatoes, fresh herbs, and a small cup of coffee arranged on a light wooden table. Place the exact headline "WEEKEND BRUNCH" at the top in bold dark green uppercase lettering. Add the exact subheading "SATURDAY & SUNDAY · 9 AM–2 PM" beneath it in smaller clean sans-serif text. Use a warm cream background, natural food styling, clear visual hierarchy, and enough spacing around every text element. Preserve the exact spelling and punctuation. Vertical 4:5 format.
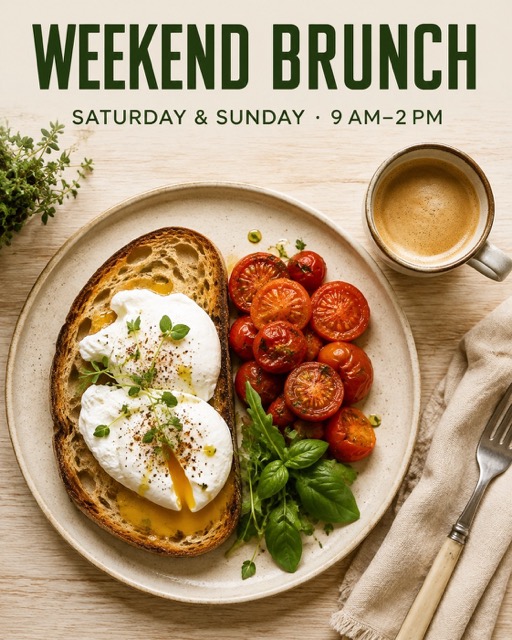 Customize: Replace the menu, headline, schedule, colors, or type style.
9. Summer Travel Poster
Use this prompt for a retro destination poster or tourism campaign.
Create an illustrated vintage travel poster for a quiet Mediterranean coastal town. Show white stone houses descending toward a turquoise bay, small fishing boats, flowering bougainvillea, and distant hills under a clear summer sky. Add the exact title "ESCAPE TO THE COAST" across the top in large cream-colored retro lettering. Place the exact subtitle "SUNLIGHT · SEA · SLOW DAYS" near the bottom. Use a 1950s screen-printed travel poster style, simplified shapes, slightly faded colors, subtle paper texture, and balanced typography. Preserve all text exactly. Vertical 2:3 composition.
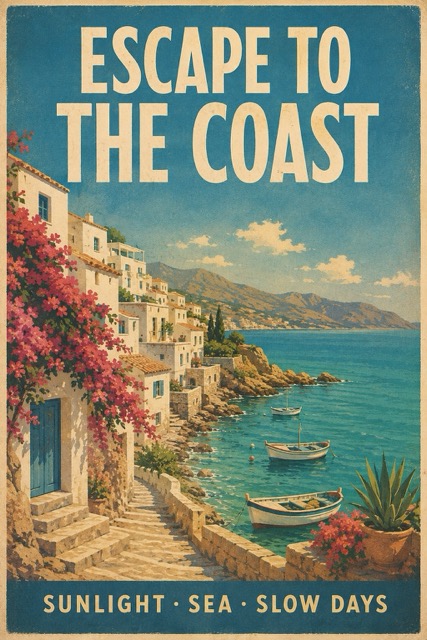 Customize: Change the destination, scenery, headline, or illustration period.
10. Fitness Campaign Poster
This prompt creates a bold promotional poster with an action-focused composition.
Create a dramatic sports campaign poster featuring a female sprinter accelerating from the starting blocks on an outdoor track. Capture the athlete from a low side angle with visible muscle tension, realistic motion, and a determined expression. Use black, warm gray, and vivid orange as the main colors. Place the exact headline "START BEFORE YOU FEEL READY" in large condensed uppercase letters on the left side. Keep the athlete on the right and preserve clear separation between the subject and text. Add subtle grain and directional sunlight. Do not alter the wording. Vertical 4:5 format.
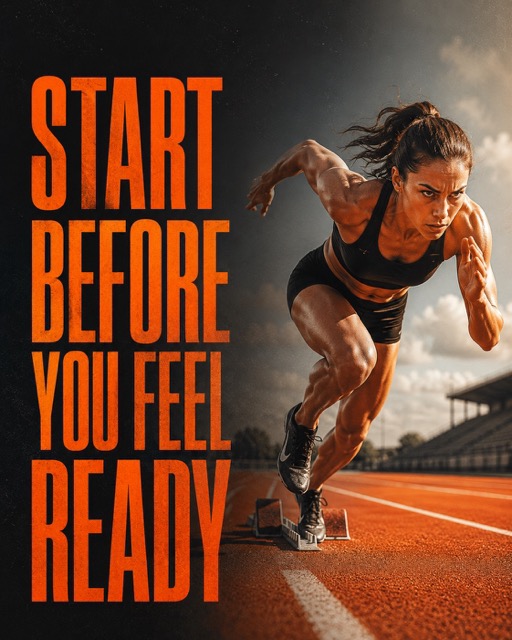 Customize: Replace the sport, athlete, slogan, or campaign colors.
11. Music Event Flyer
This prompt is suitable for concerts, clubs, festivals, and independent music events.
Design a contemporary event flyer for an intimate jazz night in a small city venue. Show a close-up silhouette of a saxophone player against a textured midnight-blue background with a soft amber spotlight. Add subtle paper grain and elegant geometric lines inspired by vintage record sleeves. Place the exact title "MIDNIGHT JAZZ" at the top, followed by "FRIDAY · 8:30 PM" and "THE BLUE ROOM" underneath. Use elegant cream typography with a clear hierarchy and generous spacing. Keep every word readable and preserve the exact spelling. Vertical 4:5 format.
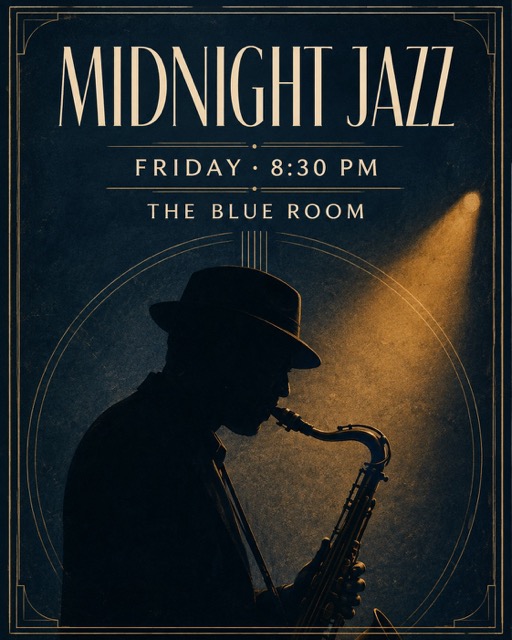 Customize: Change the music genre, performer, date, venue, or visual era.
12. Modern Coffee Packaging Concept
Use this prompt to visualize packaging with controlled typography and materials.
Create a realistic packaging mockup for a premium coffee brand called "NORTHFIELD COFFEE." Show a matte kraft paper coffee bag standing on a dark wooden counter. Print the exact product name "MORNING ROAST" below the brand in bold black serif lettering, followed by the smaller text "COCOA · ALMOND · CITRUS." Add a simple hand-drawn mountain emblem above the brand name. Use warm café lighting, realistic paper creases, accurate shadows, and a minimal artisanal design. Keep all typography centered, legible, and spelled exactly as provided. Vertical 3:4 format.
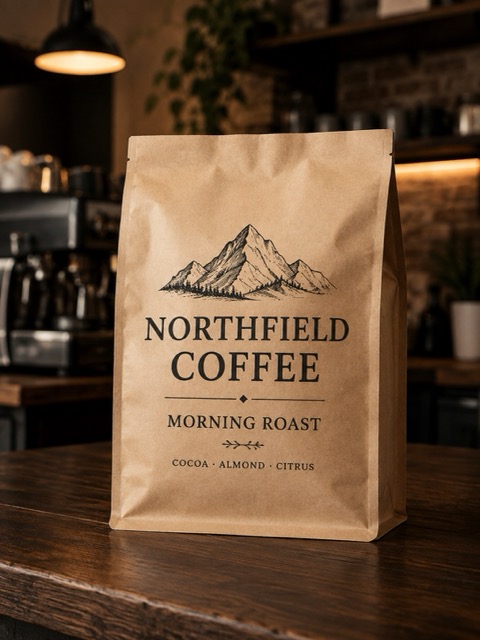 Customize: Replace the product name, tasting notes, emblem, or packaging material.
13. Educational Infographic
This prompt demonstrates how to organize multiple steps in one visual.
Create a clean educational infographic titled "HOW A SEED BECOMES A PLANT." Arrange five numbered stages from left to right: 1. SEED, 2. GERMINATION, 3. SPROUT, 4. YOUNG PLANT, 5. FLOWERING PLANT. Illustrate each stage with an accurate cross-section of soil, roots, stem, and leaves. Connect the stages with simple arrows. Use a warm off-white background, natural green and brown colors, crisp botanical illustrations, and highly legible dark text. Keep every label short, correctly spelled, and aligned with its corresponding illustration. Landscape 16:9 format.
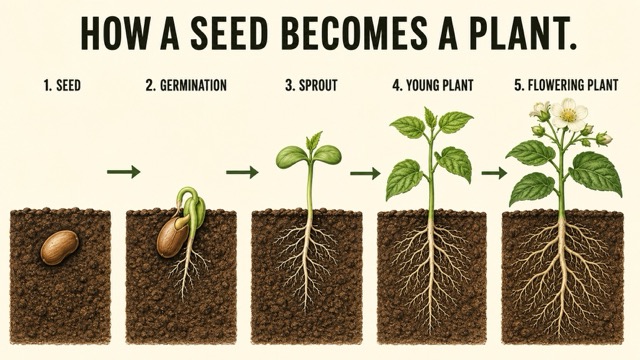 Customize: Replace the educational topic, number of stages, or visual style.
14. Mobile App Interface Concept
Use this prompt to explore UI ideas while keeping the layout practical.
Create a polished mobile app interface concept for a daily meal-planning application. Display three vertically arranged phone screens: the weekly meal overview, a recipe detail page, and a grocery checklist. Use a warm off-white background, dark charcoal text, muted green buttons, rounded cards, realistic food thumbnails, and consistent spacing. Include short readable interface labels such as "My Week," "Recipes," "Shopping List," and "Add Meal." Keep the design accessible, practical, and visually consistent. Avoid decorative elements that reduce usability. Landscape 16:9 presentation format.
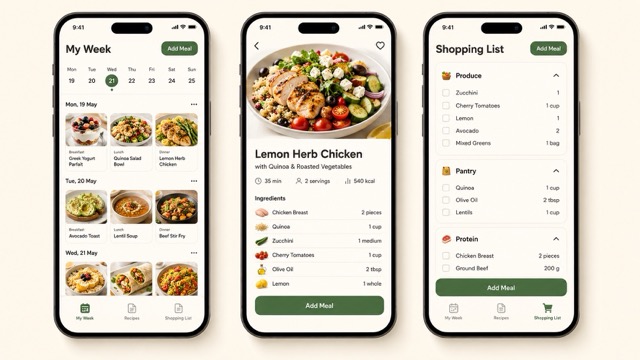 Customize: Replace the app category, interface labels, colors, or screen count.
15. Soft Anime Character Scene
This prompt creates an anime illustration with a complete environment and narrative mood.
Create a detailed anime-style illustration of a teenage girl waiting at a quiet countryside train station shortly before sunset. She wears a navy school uniform and carries a yellow umbrella at her side. Add an old wooden platform, wild grass moving in the breeze, distant rice fields, utility poles, and warm clouds after light rain. Use soft linework, expressive but natural eyes, painterly background details, gentle amber and blue colors, and cinematic framing. Keep both hands anatomically correct and the umbrella clearly separated from the body. Landscape 16:9 format.
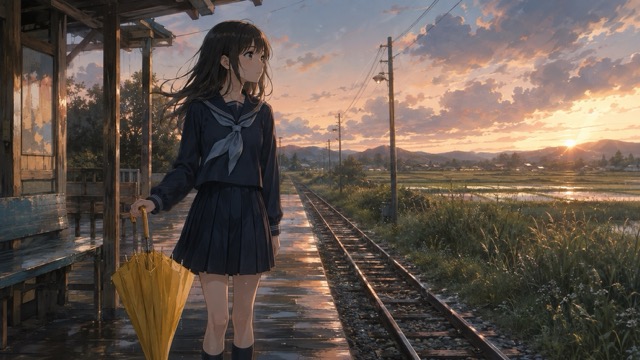 Customize: Replace the character, location, weather, clothing, or time of day.
16. Children’s Book Illustration
Use this prompt for a warm narrative illustration without adding unnecessary text.
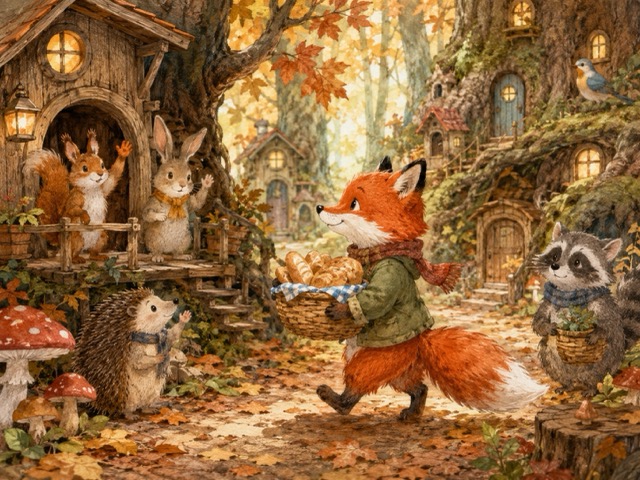
Create a charming children’s book illustration of a small red fox delivering a basket of bread through a peaceful forest village. Show tiny wooden houses built around tree roots, glowing windows, mushrooms, fallen leaves, and friendly woodland animals greeting the fox. Use hand-painted watercolor textures, soft pencil outlines, warm autumn colors, and a clear storybook composition. The fox should remain the main focus while the environment contains playful details for children to discover. Do not add text, borders, or speech bubbles. Landscape 4:3 format.
 Customize: Change the animal, activity, season, or illustration technique.
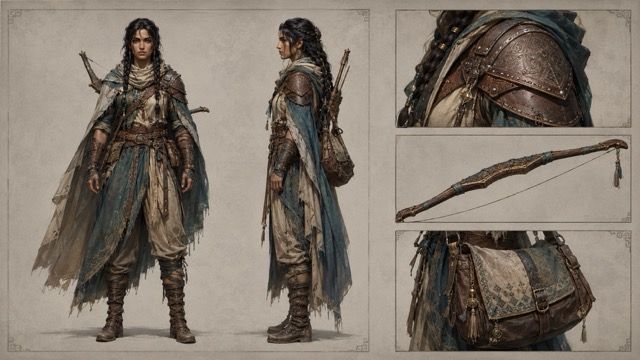
17. Fantasy Game Character Concept
This prompt can be used to create a detailed game character design sheet.
Create a professional fantasy game character concept sheet for a female desert ranger. Show one full-body front view, one side view, and three smaller detail panels for her leather shoulder armor, curved bow, and embroidered travel bag. She has dark braided hair, sun-worn layered clothing, practical boots, and a muted sand-and-teal color palette. Use precise concept-art rendering, consistent costume details across every view, clean neutral background, and small visual separators between panels. Do not add labels or decorative text. Landscape 16:9 format.
 Customize: Replace the character class, environment, equipment, or color palette.
18. Change a Product Color
Upload a product image before using this editing prompt.
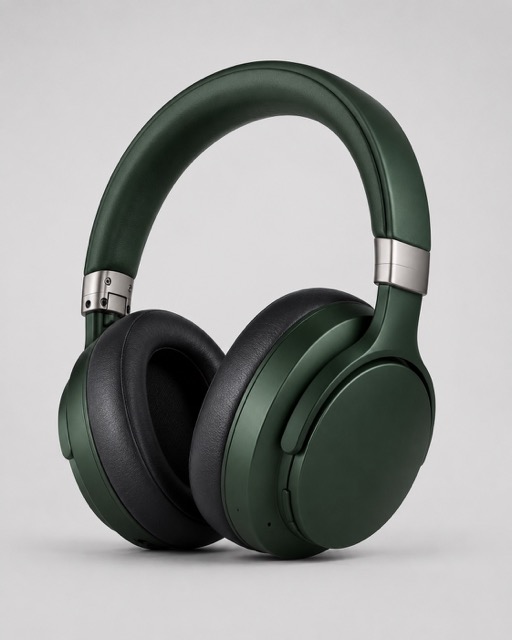
Change only the main body color of the uploaded product from its current color to deep forest green with a soft satin finish. Preserve the product’s exact shape, proportions, logo, label text, buttons, seams, materials, camera angle, lighting direction, reflections, shadows, and background. The new color must follow the original highlights and surface texture naturally. Do not move, resize, replace, or redesign any part of the product.
 Customize: Replace the selected area, target color, or surface finish.
19. Replace a Photo Background
Use this editing prompt to place an existing subject into a new environment.
Remove the current background and place the existing subject inside a bright, naturally lit photography studio with a warm off-white wall and a light gray floor. Add a soft realistic contact shadow beneath the subject so it feels physically grounded in the new environment. Preserve the subject’s identity, face, hairstyle, pose, clothing, body proportions, edges, colors, and all foreground details exactly as shown. Do not retouch the face or alter the original subject. Match the new background lighting to the subject naturally.
 Customize: Replace the new environment, lighting, or floor material.
20. Combine Multiple Reference Images
Upload the required references and keep them in the order mentioned in the prompt.
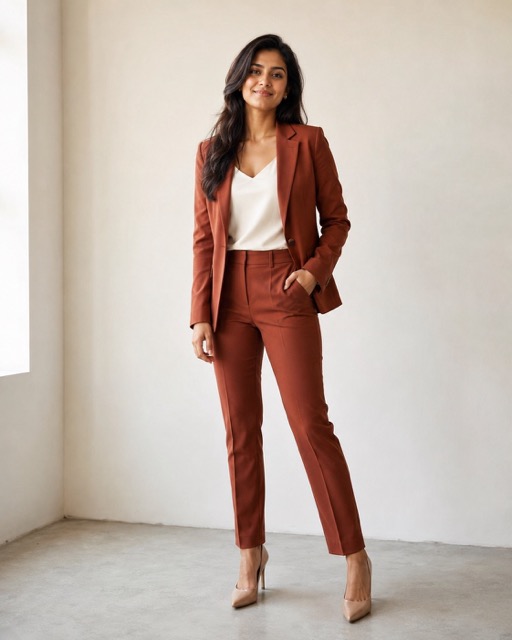
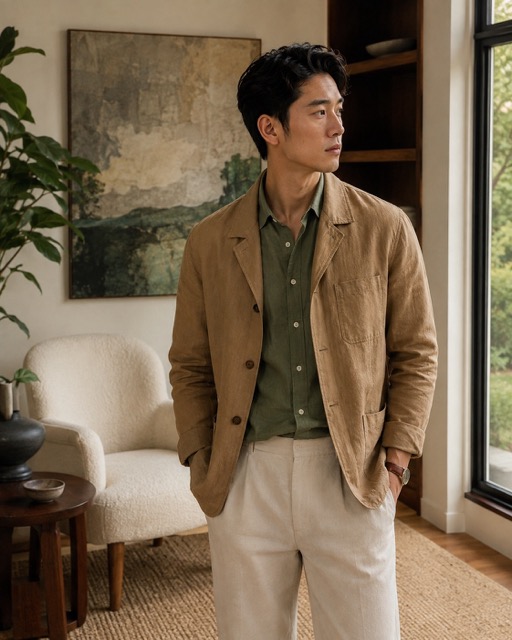
Use Reference Image 1 for the person’s identity, facial features, hairstyle, and body proportions. Use Reference Image 2 for the exact outfit design, including its colors, fabric, stitching, and accessories. Use Reference Image 3 for the interior location and furniture arrangement. Use Reference Image 4 only for the warm brown, cream, and muted green color palette. Create a natural editorial photograph of the person standing beside the window in the referenced interior while wearing the referenced outfit. Match all elements into one believable lighting environment. Preserve the person’s identity and the outfit’s construction. Do not blend facial features, add accessories, change the furniture layout, or introduce unrelated objects. Vertical 4:5 format.
 Customize: Assign a different role to each uploaded reference image.
Useful Imagine Image 2.0 Editing Instructions
When a result is close but not correct, a short, targeted editing instruction is usually more useful than repeating the original prompt.
Correct Text Without Changing the Design
Replace only the incorrect headline with the exact text "[INSERT CORRECT TEXT]." Preserve the existing font style, size, color, alignment, spacing, background, illustrations, and complete poster layout. Do not modify any other text or visual element.
Fix a Hand
Correct only the selected hand so it has natural anatomy, five clearly formed fingers, a relaxed pose, and lighting consistent with the original image. Preserve the person’s identity, face, clothing, body position, background, camera angle, and every other part of the image.
Remove an Unwanted Object
Remove only the selected object and reconstruct the hidden background naturally using the surrounding textures, light, perspective, and shadows. Do not move or alter any nearby subjects or objects.
Add Space for Marketing Copy
Extend the image naturally toward the left to create clean negative space for marketing text. Preserve the original subject, product, lighting, perspective, colors, and image quality. Continue the existing background without adding new people, objects, logos, or text.
Tips for Better Imagine Image 2.0 Results
Give Every Reference a Role
When uploading multiple images, explain which reference controls the character, product, style, location, clothing, composition, or color palette.
Keep Important Text Short
Short headlines and labels are easier to render accurately than dense paragraphs. For longer text, generate the main visual first and add the final copy in a design editor.
Describe Positions Explicitly
Use instructions such as “place the product in the lower-right corner” or “leave the upper-left area empty” instead of assuming the model will choose the intended layout.
Separate Creative Directions from Constraints
First describe what you want to create. Then finish the prompt with a short list of details that must remain unchanged.
Edit One Problem at a Time
If the image contains an incorrect color, object, and headline, fix each problem separately. Multiple unrelated editing instructions can make it harder to preserve the correct parts.
Check Important Details Before Publishing
Always review generated images containing:
- Product labels
- Prices
- Dates
- Addresses
- Instructions
- Statistics
- Maps
- Medical or safety information
- Brand names
- Multilingual text
AI-generated visuals can still contain errors even when the overall design looks convincing.
Practical Uses for Imagine Image 2.0
Imagine Image 2.0 can support different stages of a creative workflow.
Marketing and Advertising
Teams can create initial concepts for campaign posters, social media ads, product launches, seasonal promotions, and branded visuals.
E-Commerce
Sellers can generate clean product settings, change product colors, remove backgrounds, create lifestyle scenes, and adapt one image for different storefront placements.
Content Creation
Bloggers and social media creators can produce cover images, thumbnails, illustrated explainers, quote graphics, and platform-specific versions of one visual.
Design Exploration
Designers can use the model to explore poster layouts, packaging directions, color combinations, UI concepts, icons, and visual identities before developing the final asset manually.
Game and Story Development
Imagine Image 2.0 can help create characters, locations, props, interface elements, and storyboards while maintaining a shared visual direction.
Common Imagine Image 2.0 Problems and Fixes
The Result Looks Generic
Add a more specific environment, camera angle, material description, lighting setup, and color palette. Replace vague style words with visual instructions.
The Text Is Incorrect
Use shorter text, put it inside quotation marks, identify its exact location, and request unchanged spelling. If only one word is wrong, edit that word instead of regenerating the entire poster.
The Product Shape Changes
State that the product geometry, proportions, label, logo, seams, buttons, and camera angle must remain unchanged. Use the original product image as a reference.
Multiple References Become Blended
Assign one purpose to every reference. Explicitly tell the model not to mix facial features, product shapes, outfits, or environmental elements.
The Edit Changes the Entire Image
Select a more precise area and begin the instruction with “Change only the selected area.” Follow it with a list of elements that must remain unchanged.
The Composition Does Not Fit the Platform
Specify the destination and aspect ratio in the original prompt, or use Smart Resize to recompose the finished image for another format.
Frequently Asked Questions
What is Imagine Image 2.0?
Imagine Image 2.0 is xAI’s image generation and editing model for creating photographs, designs, illustrations, advertisements, infographics, and other visual assets from text or reference images.
Is Imagine Image 2.0 the same as ImagineArt 2.0?
No. Imagine Image 2.0 is associated with xAI and Grok Imagine, while ImagineArt 2.0 is a separate model offered by ImagineArt. The similar names can cause confusion, so articles and prompts should identify the correct product.
Where can I use Imagine Image 2.0?
Imagine Image 2.0 is available as Quality Mode through Grok Imagine on the web and in the Grok iOS and Android apps.
Can Imagine Image 2.0 edit existing photos?
Yes. It can modify selected regions, segment image elements, remove backgrounds, resize compositions, and combine multiple reference images.
How many reference images can Imagine Image 2.0 use?
The official release states that Multi-Reference Editing can accept up to five input images in a single generation.
Can it generate text inside images?
Imagine Image 2.0 is designed to improve text rendering, typography, and layout generation. However, users should still verify spelling, dates, numbers, and other important information before publishing a result.
What is the best Imagine Image 2.0 prompt structure?
A useful structure is:
Subject + Environment + Composition + Camera + Lighting + Color Palette + Style + Exact Text + Output Format + Preservation Constraints
Does Imagine Image 2.0 support different aspect ratios?
Yes. Its Smart Resize feature can adapt an image to vertical, square, landscape, and banner formats while filling and reorganizing the frame.
Is Imagine Image 2.0 API access available?
At the time of the official August 2026 announcement, xAI stated that API access was coming soon. Check the current xAI documentation before planning a production integration.
Final Thoughts
Imagine Image 2.0 moves AI image creation beyond simple text-to-image generation. Its combination of detailed prompt following, typography, localized editing, multi-reference support, background removal, and Smart Resize makes it especially useful for practical creative workflows.
The strongest results still depend on clear instructions. Define the subject, organize the composition, describe the light and materials, provide exact text, and state what must remain unchanged. When editing an existing result, change one targeted area at a time instead of regenerating the complete image.
Use the 20 Imagine Image 2.0 prompts in this guide as starting points. Copy the closest example, replace its subject and visual details, and refine the result until it fits your project.